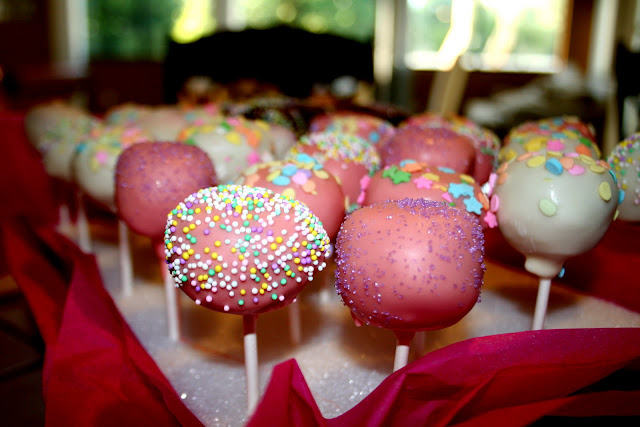
So, it came time for me to bring a nice little creation to the M.O.P.S. (Mothers Of Pre-Schoolers) meeting this week. As always I literally spend two weeks going crazy deciding what to make. I think I'm always at a loss of ideas because it's more geared toward breakfast stuff. So, I made muffins last time. Lately I had been in the mood to make cake pops. Like literally every time I went to starbucks (which was A LOT the past two weeks) I was having a stare down with the new cake pops on the menu. I did finally order one yesterday when I got coffee too, just to see how theirs ranked... I wasn't impressed I must say. I tried the birthday cake one and the tiramisu, and really... not into them.
So, I was browsing blogs and recipe sites for days.. Finally I found it... the Pop idea I'd been dreaming of.
CHEESECAKE POPS!
Yeah, you can say it... just sounds like words from an angels mouth, right? AMAZING!
So, that's what I made.....
These things turned out AMAZING!
Now I'm gonna be honest with you guys cause I'm all about being real, and I'm not always the best cook or baker. I've had my fair share of screw ups.
So, there is no right or wrong cheesecake for these pops. If you have an amazing cheesecake recipe then use it! If you suck at making cheesecake then just go BUY a cheesecake. Once you make or buy the cheesecake, just put it all in your mixer.... crust and all. I had see these done without any graham crust and in my opinion it would be WAY harder. The Graham give the filling a good texture and make them easier to roll into a ball. I mixed all mine and then I used some blended graham crackers and put them on a sheet pan. Once I plopped out the cheesecake and crust mixture I rolled it around in the graham crackers I had blended. This gave them a nice coating on the inside so they didn't stick to everything. Then I rolled them into balls. I put these balls on wax paper on a cookie sheet and stuck them in the freezer for about 30 minutes.
I then melted my chocolate candy melts. Just like I said in my last post, put them in the microwave for 30 seconds at a time ONLY! You WILL burn the chocolate if you do more. And stir between EVERY heating interval. Even if they don't LOOK melted, STILL stir them. The head doesn't always transfer evenly and if you leave them in the same spot, your gonna burn them more than likely.
So, then I took my sticks, dunked them about an inch into the melted chocolate, then stuck them into the balls. Now I found if you let them set like this for a minute and let the chocolate that's on the stick harden, you're much less likely to to loose a ball in the chocolate.
So then I simply dunked the balls on the sticks into the chocolates, let the excess fall off by tapping the stick on the side of the bowl. Then added sprinklers and stuck them in the foam to dry.
I stored mine overnight in the fridge cause my tall rottweiller would LOVE these pops.
They were a HIT! Got everyone's approval! :D


look an sound so yummy I will have to try them sometime!
ReplyDeleteCrystal
I've never tried cake pops before. You make it look so easy! Yum!
ReplyDeleteYum! Can I have one?! I've never made these before but these make me want to try. Thanks for linking up to my Catch a Glimpse party! :)
ReplyDelete